

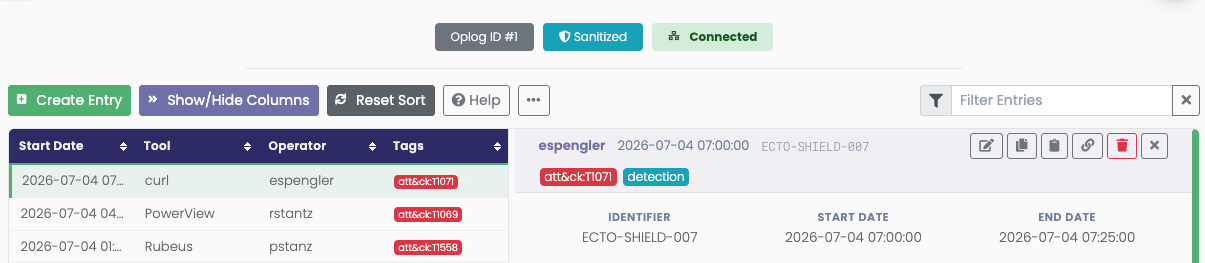
There will be times when you will need the log’s unique ID. The ID number is displayed in the log header.
Creating an Entry
To manually create an entry, click on the “Create a new entry” button in the action bar or by pressingCTRL+N:
Modifying an Entry
You can modify fields by double-clicking the table row you want to edit or pressing Enter while it is selected. A modal form will open: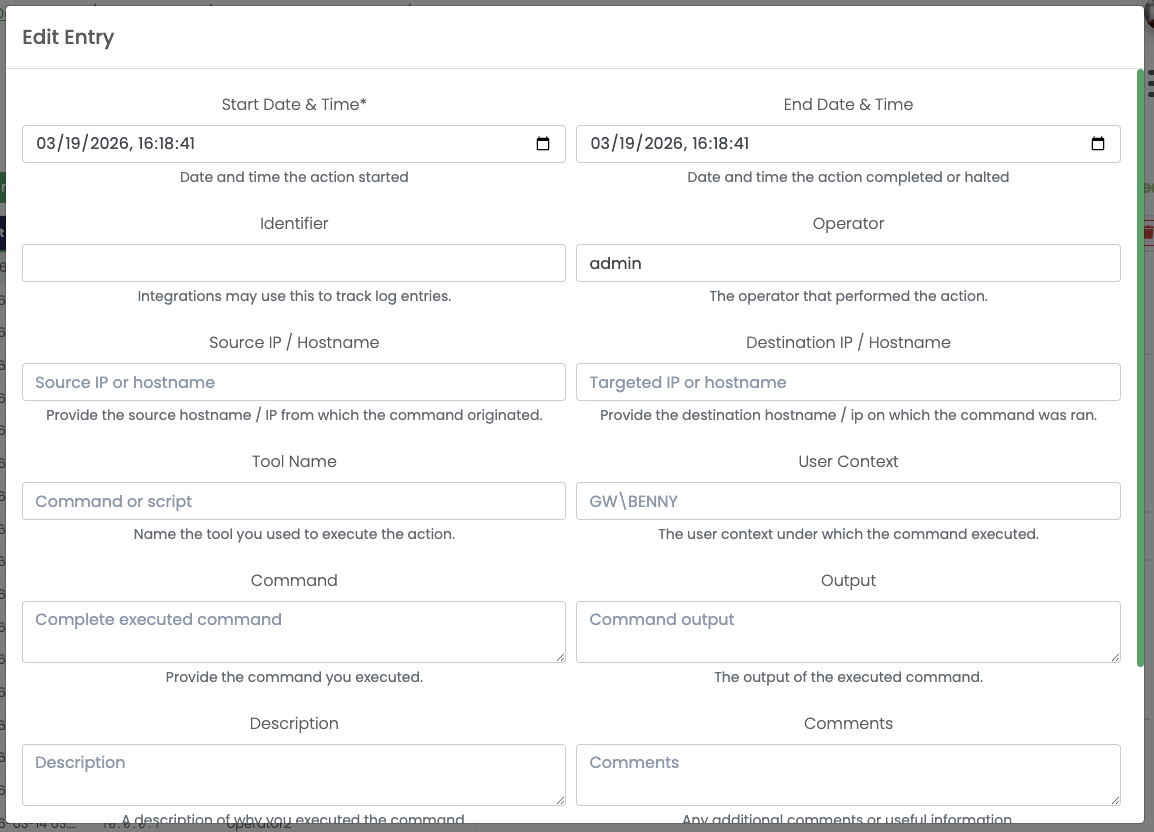
Linking, Copying, & Deleting Entries

Managing the Table View
The command bar at the top of the page includes several powerful customization features and your connection status indicator.Customizing Columns
You can customize the left-hand table view using the Show/Hide Columns button. Click it to reveal the column options and toggle columns on or off.
Sorting Entries
You can also sort your log entries. By default, the page sorts log entries in descending order, from the most recent to the oldest. You can sort by any column by clicking it. You can sort by multiple columns by holding Shift as a you click.Filtering Entries
You can filter the table using the box on the right. This filter helps you view log entries related to a specific user, host, or command. To use the filter, type in the keyword and press. The filter is applied as you type, so you can keep typing to narrow the results further.Log Status and Connection
The log header includes the WebSocket connection status. Since all entries are created, modified, and deleted using WebSockets, a persistent connection is maintained. If the connection is ever lost, the badge turns red and reports that it is disconnected. When disconnected, you will not be able to create, modify, or delete rows. When an authorized user has sanitized the log, the header also displays a Sanitized badge. Select it to see the last sanitization’s date and time, requesting user, and selected fields. If an entry has been created or materially edited since that action, the badge indicates that there are new changes and the details explain that the sanitization is no longer current.Sanitizing Entries
Managers and administrators can select Sanitize Entries from the overflow menu in the command bar. Sanitization is a manual, on-demand action; Ghostwriter does not automatically sanitize activity logs. Choose the fields to scrub and confirm the action. Ghostwriter records each successful sanitization with its date and time, the user who requested it, and the fields selected. The status uses the latest entry update time to help determine whether entry content has changed after the most recent sanitization.Updating tags on a log entry does not flag a sanitized log as needing review. You can safely update tags for
reporting purposes after sanitization, if needed.
Applying Tags to Log Entries
Like many objects in Ghostwriter, you can add tags to a log entry to help with filtering and tracking. The log table will change how certain tags appear in the table: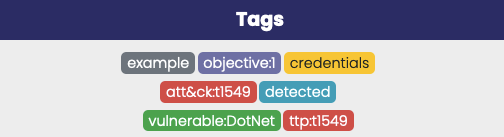
-
att&ck,attack,mitre, orttpwill appear as red tags (e.g.,ttp:t1549) -
credsorcredentialswill appear as yellow tags -
vulnwill appear as green tags (e.g.,vulnerable:DotNetPE) -
detectwill appear as blue tags (e.g.,detected) -
objectivewill appear as purple tags (e.g.,objective:1)
Additional styles may be added in the future for different tags. The development is open to suggestions.
evidence tag for linked evidence and the recording tag for
terminal recordings. Ghostwriter will also remove the tags automatically if you remove the file(s).
Muting Log Notifications
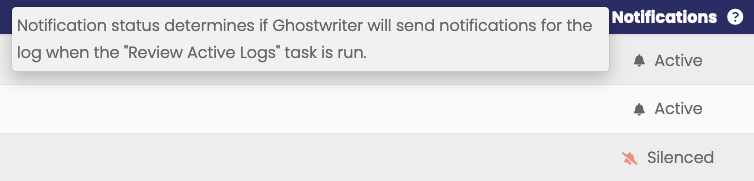
By default, all new operation logs have notifications enabled. The optional Operation Log Monitor task handles notifications. If desired, a user with theadmin or manager role can mute notifications from the hamburger menu in the upper-right corner of the logging page.
Notification status is also displayed in the operation logs table:
Attaching Content to Log Entries
Beyond the core log entry fields, Ghostwriter supports attaching additional content to entries to provide more context and documentation.Attaching Evidence
You can link existing report evidence to a log entry. This allows you to associate relevant information with the specific activity documented in the entry. Evidence is displayed in a dedicated section within the entry details, with direct links to the original evidence. See Linking Evidence to Log Entries for detailed instructions.Attaching Terminal Recordings
You can upload terminal session recordings (Asciinema.cast or .cast.gz files) to document the exact commands and output from your operational
activities. Recordings are stored with the log entry and can be played back directly within the application using the integrated
Asciinema player.
See Attaching Terminal Recordings to Log Entries for detailed instructions.