Ghostwriter integrates with v8.4 and later of both BloodHound Community Edition and BloodHound Enterprise. There are some differences
between the two. You can learn more here: Differences Between BHCE and BHE
Generating an Access Token
Generate your BloodHound access token by logging into your BloodHound instance and opening the Administration section from the sidebar menu. Click Manage Users and then click the hamburger menu next to the user you want to use for the API access. Select Generate/Revoke API Tokens.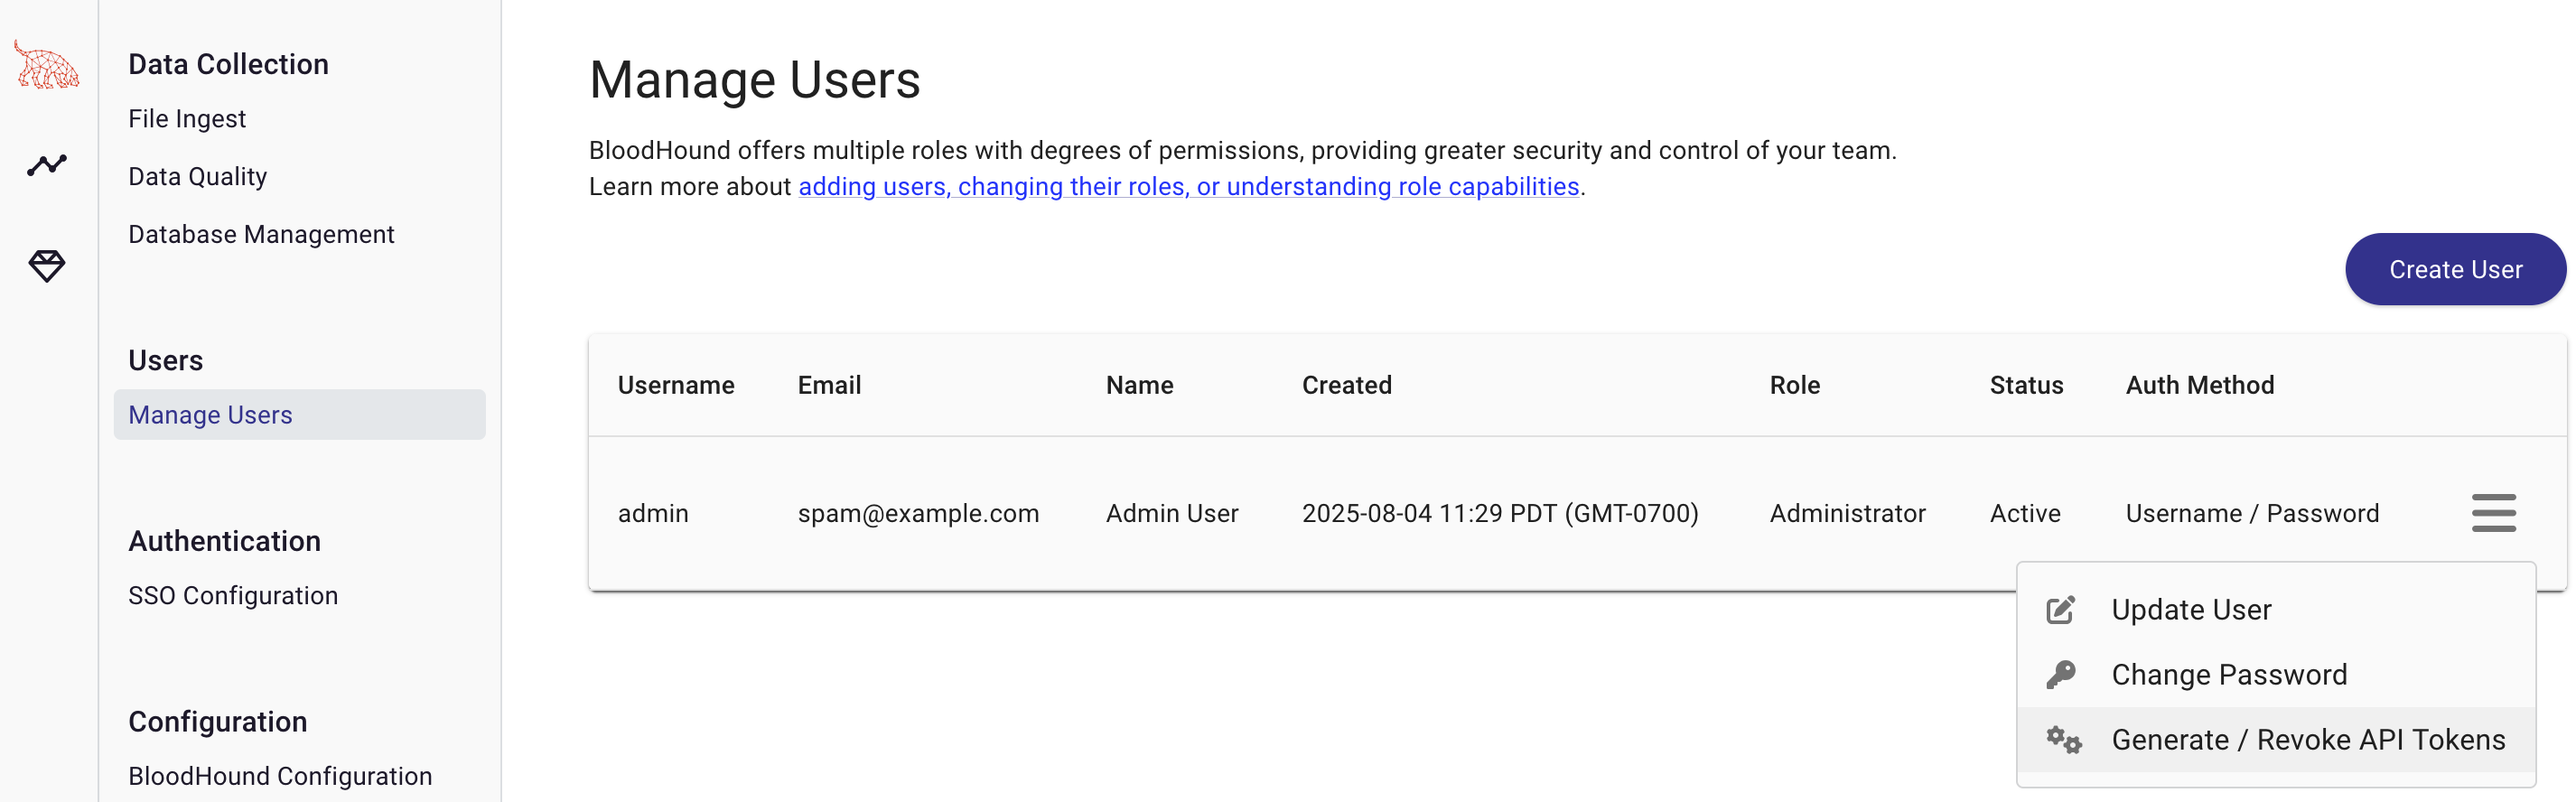
Configuring the BloodHound API in Ghostwriter
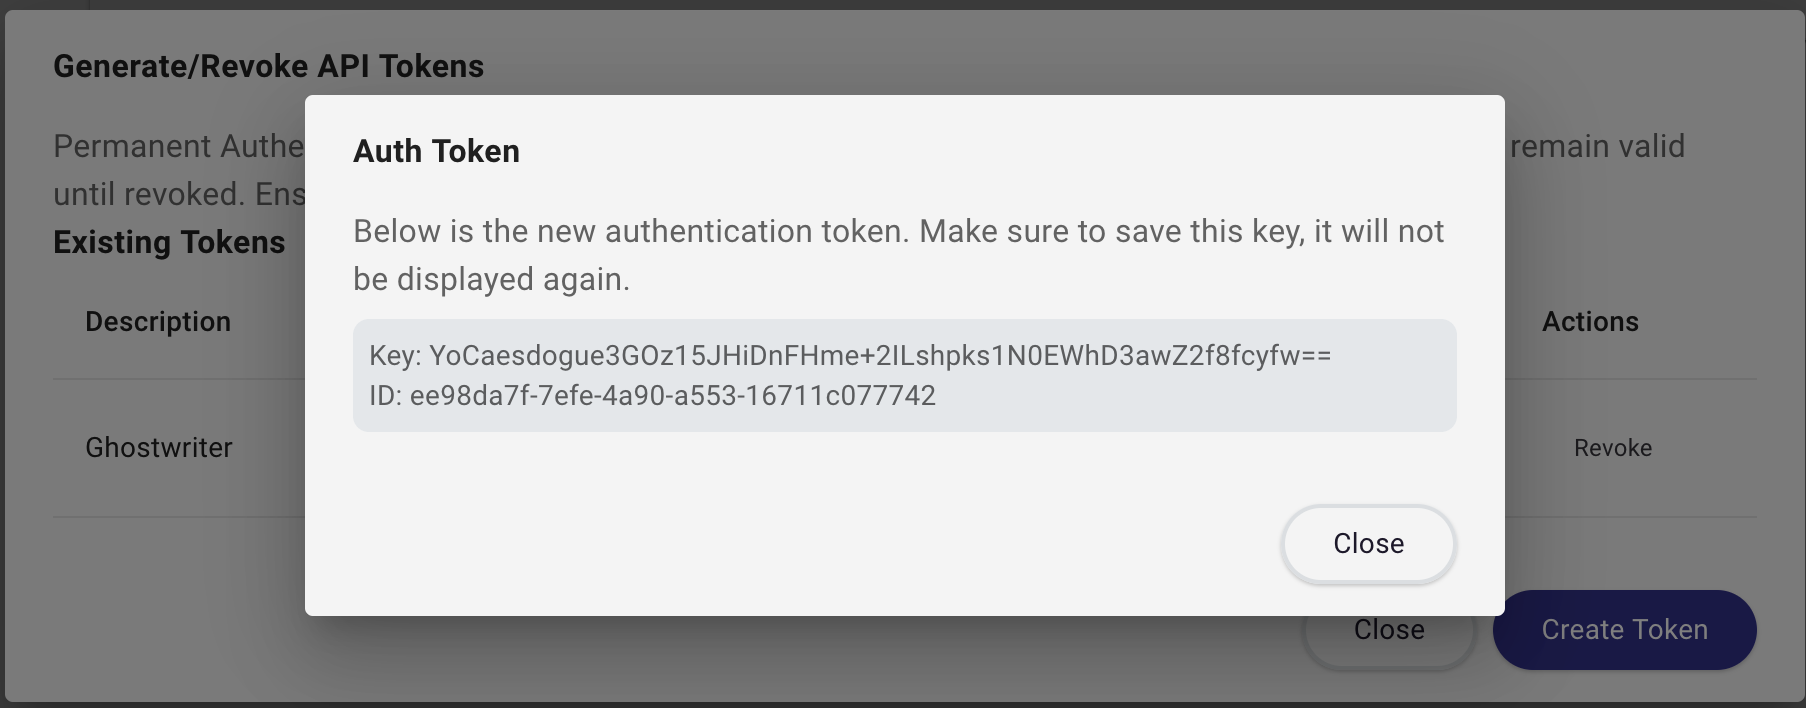
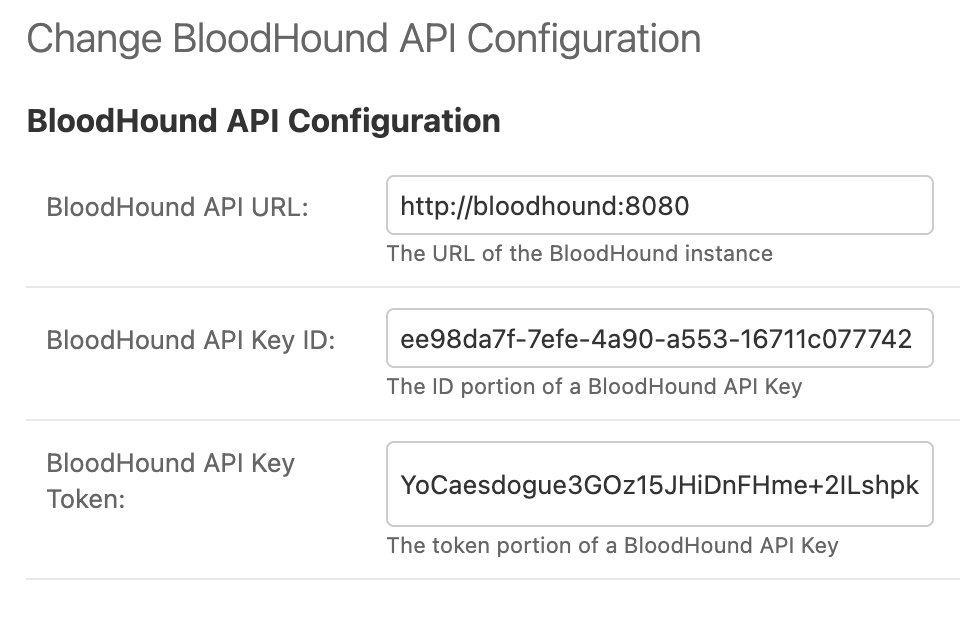
Take the ID and Token values and plug them into the BloodHound API Configuration in Ghostwriter. You will also need to add the URL of your BloodHound instance. The URL should be the base URL of your BloodHound instance, including the protocol and port (if needed). For example,http://bloodhound:8080.
Ghostwriter supports two configuration models:
- A shared global BloodHound configuration in the admin interface
- A project-specific BloodHound configuration on an individual project
Testing the Configuration
Once you have configured the BloodHound API in Ghostwriter, an admin can test the shared global configuration from the BloodHound admin page. This sends a request to the/api/version endpoint of the BloodHound API and verifies that the
connection is successful.
If a project has its own BloodHound API settings, project members can test that project-specific configuration from the
project’s BloodHound tab.