> ## Documentation Index
> Fetch the complete documentation index at: https://www.ghostwriter.wiki/llms.txt
> Use this file to discover all available pages before exploring further.
# Configuring BloodHound
> How to integrate your BloodHound server(s) with Ghostwriter
Ghostwriter integrates with BloodHound to pull data from the BloodHound graph and makes it available in your report
templates. If the BloodHound API is enabled and configured, Ghostwriter pulls the BloodHound data when you generate a
report.
Ghostwriter integrates with v8.4 and later of *both* BloodHound Community Edition and BloodHound Enterprise. There are some differences
between the two. You can learn more here: [Differences Between BHCE and BHE](/features/bloodhound-integration/differences-between-bhce-and-bhe)
To enable the BloodHound API, generate your access token, and configure the API in Ghostwriter, follow these steps:
## Generating an Access Token
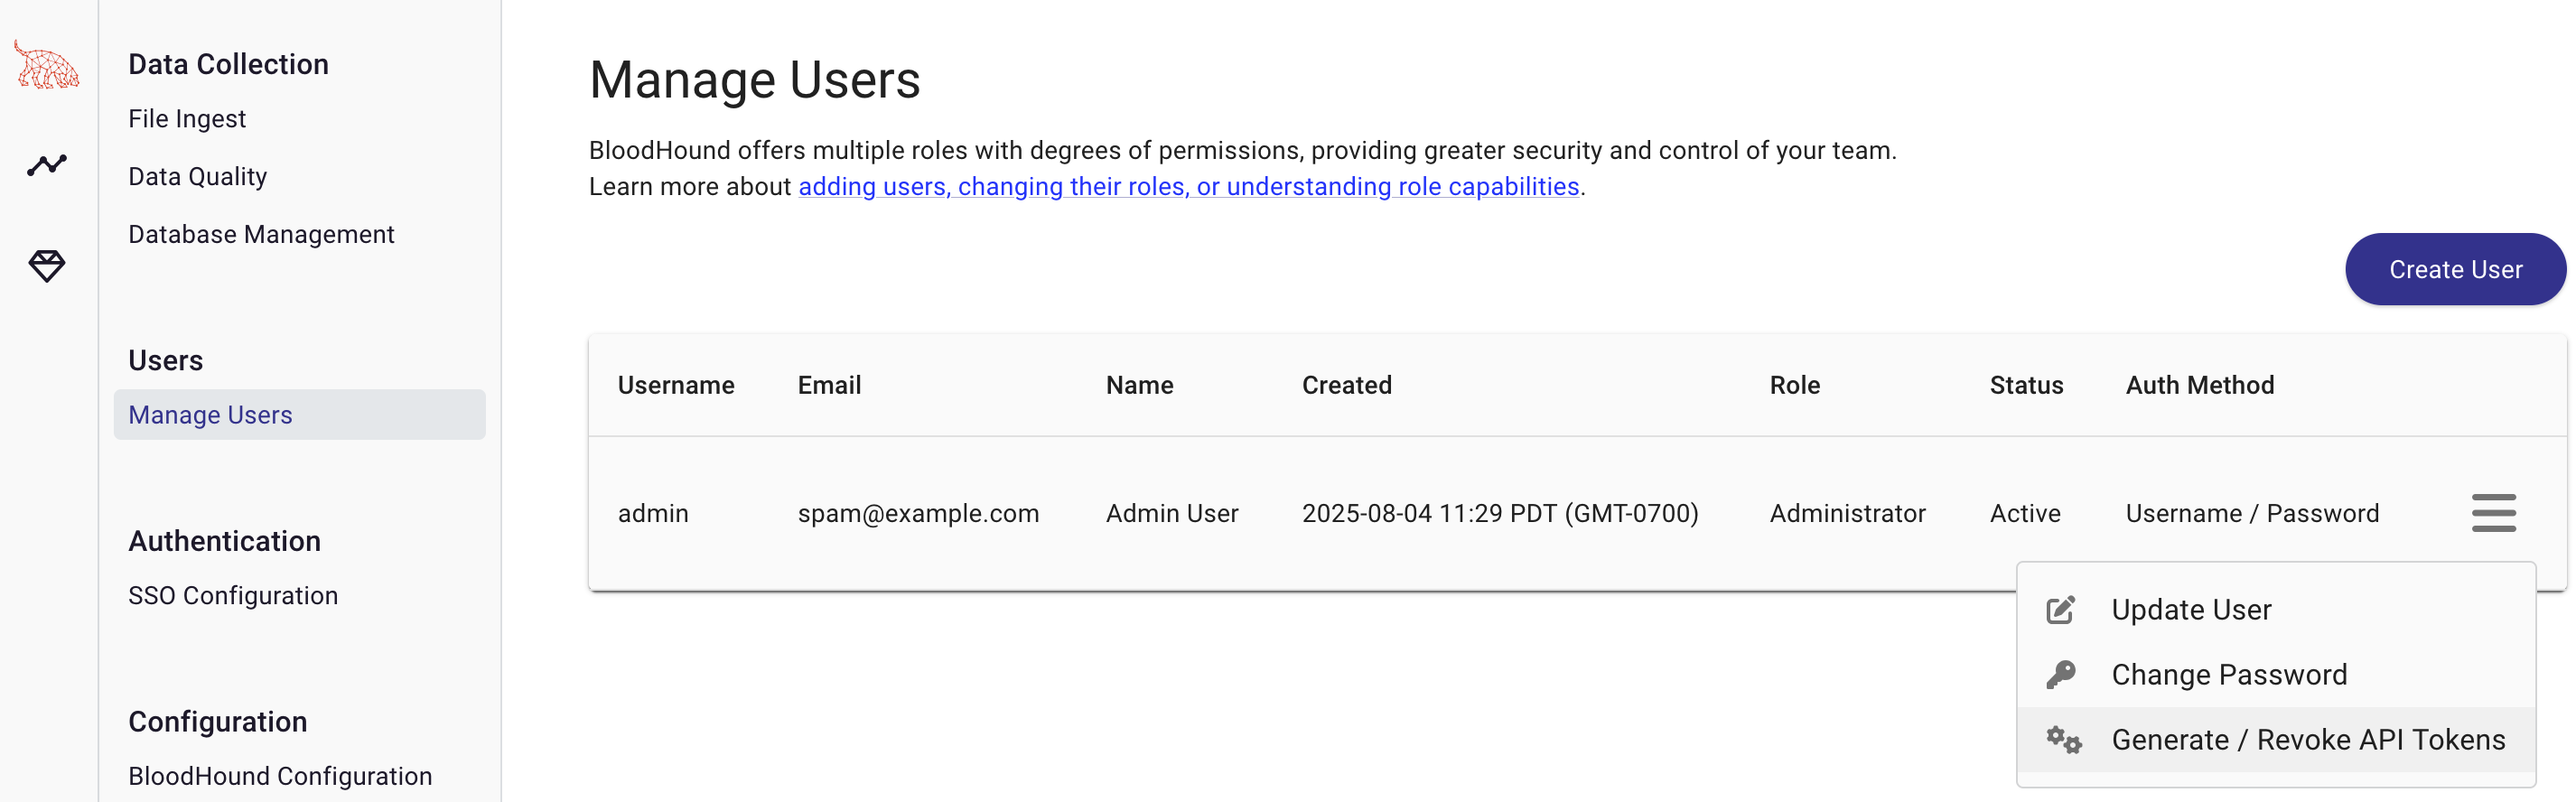
Generate your BloodHound access token by logging into your BloodHound instance and opening the *Administration* section
from the sidebar menu.
Click *Manage Users* and then click the hamburger menu next to the user you want to use for the API access. Select
*Generate/Revoke API Tokens*.
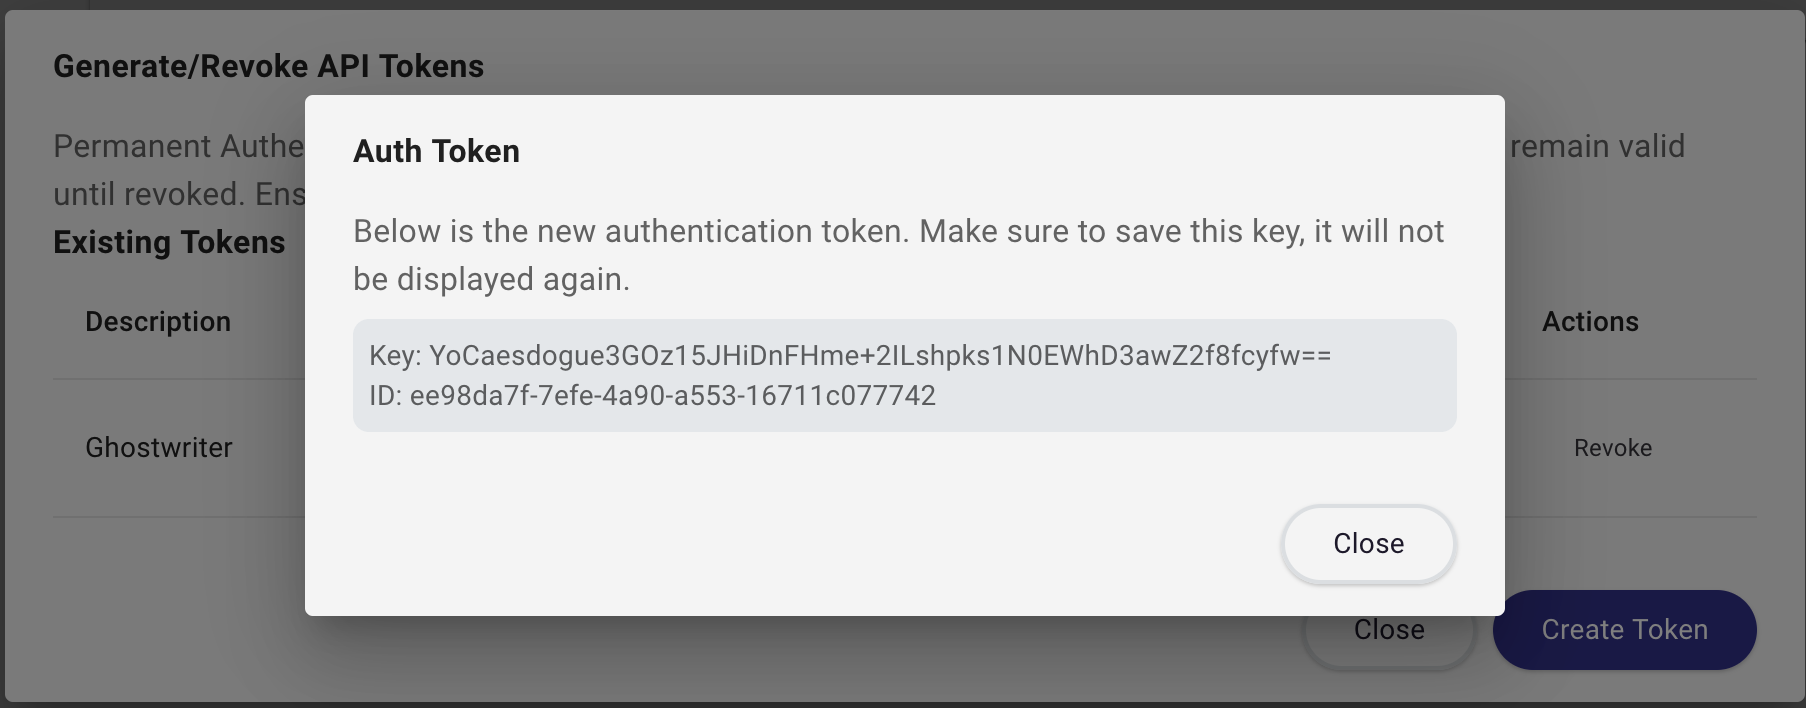
 Give your token a name and generate it. Take note of the *Key* and *ID* values in the modal window.
 ### Configuring the BloodHound API in Ghostwriter
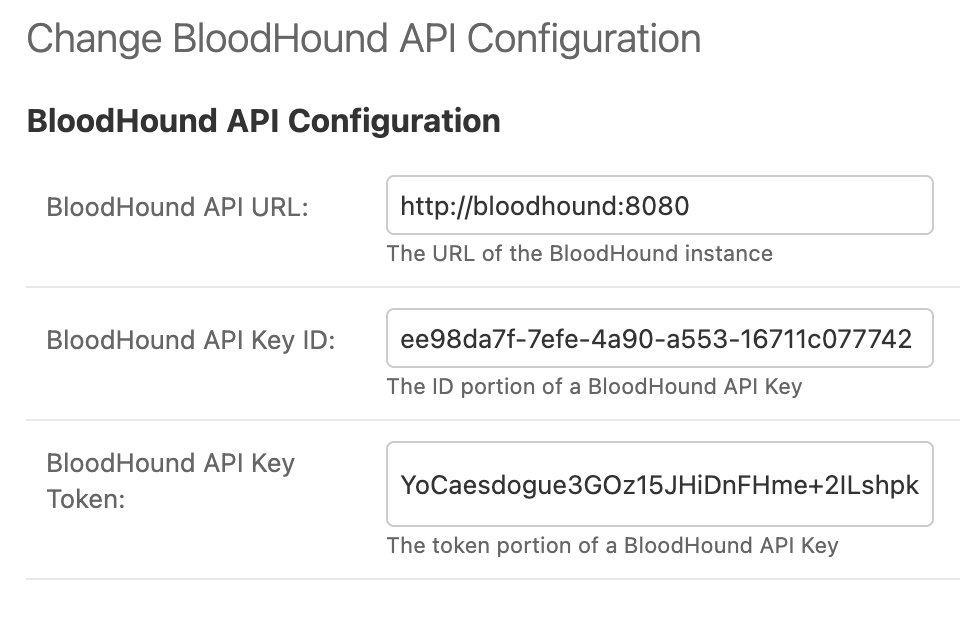
Take the *ID* and *Token* values and plug them into the BloodHound API Configuration in Ghostwriter. You will also need
to add the URL of your BloodHound instance. The URL should be the base URL of your BloodHound instance, including the
protocol and port (if needed). For example, `http://bloodhound:8080`.
Ghostwriter supports two configuration models:
* A shared global BloodHound configuration in the admin interface
* A project-specific BloodHound configuration on an individual project
The shared global configuration is reused by projects that do not have their own BloodHound API settings. Use the
global configuration only when that shared-access model is intentional for your environment.
By default, the global configuration is managed from the admin page only. Projects use it only when an admin enables
*Allow Projects to Use Shared Configuration*.
### Configuring the BloodHound API in Ghostwriter
Take the *ID* and *Token* values and plug them into the BloodHound API Configuration in Ghostwriter. You will also need
to add the URL of your BloodHound instance. The URL should be the base URL of your BloodHound instance, including the
protocol and port (if needed). For example, `http://bloodhound:8080`.
Ghostwriter supports two configuration models:
* A shared global BloodHound configuration in the admin interface
* A project-specific BloodHound configuration on an individual project
The shared global configuration is reused by projects that do not have their own BloodHound API settings. Use the
global configuration only when that shared-access model is intentional for your environment.
By default, the global configuration is managed from the admin page only. Projects use it only when an admin enables
*Allow Projects to Use Shared Configuration*.
 #### Testing the Configuration
Once you have configured the BloodHound API in Ghostwriter, an admin can test the shared global configuration from the
BloodHound admin page. This sends a request to the `/api/version` endpoint of the BloodHound API and verifies that the
connection is successful.
If a project has its own BloodHound API settings, project members can test that project-specific configuration from the
project's *BloodHound* tab.
#### Per-Project Instances
If you have multiple BloodHound instances — such as seperate servers for different clients — you can configure a BloodHound server for a project.
Project members can manage their project-specific BloodHound instance under the *BloodHound* tab on the project dashboard.
If a project does not have its own BloodHound configuration, Ghostwriter falls back to the shared global configuration
and uses the cached results associated with that shared server only when an admin has enabled project fallback on the
global configuration.
#### Testing the Configuration
Once you have configured the BloodHound API in Ghostwriter, an admin can test the shared global configuration from the
BloodHound admin page. This sends a request to the `/api/version` endpoint of the BloodHound API and verifies that the
connection is successful.
If a project has its own BloodHound API settings, project members can test that project-specific configuration from the
project's *BloodHound* tab.
#### Per-Project Instances
If you have multiple BloodHound instances — such as seperate servers for different clients — you can configure a BloodHound server for a project.
Project members can manage their project-specific BloodHound instance under the *BloodHound* tab on the project dashboard.
If a project does not have its own BloodHound configuration, Ghostwriter falls back to the shared global configuration
and uses the cached results associated with that shared server only when an admin has enabled project fallback on the
global configuration.